Having done basic assembly, its time to discuss the single sticking point for many folks regarding the Panther box from PSC, namely the lack of zimmerit. I made a platoon of early-model Gs, (which I'll detail in Part II) and wanted to properly add their zimmerit paste. Thanks go to my fiancee for taking pictures, since trying to do this alone would be either hectic or nightmarish.
First of course, we gather the materials. Here I have my early-model G, with the liquid greenstuff. I find this product not so good at gap filling (which is what they sell it for) but great for adding texture, or making rivets.
First using an older, starting-to-fray detail brush, I dab it on. Dabbing rather than painting gives a nice thick volume, and starts to texture the surface. I highly recommend you do this in small sections, because you want to ensure the greenstuff is wet when you do the next stage, and it's also good to ensure you let it dry before moving to another panel, to avoid thumbprint zimmerit!
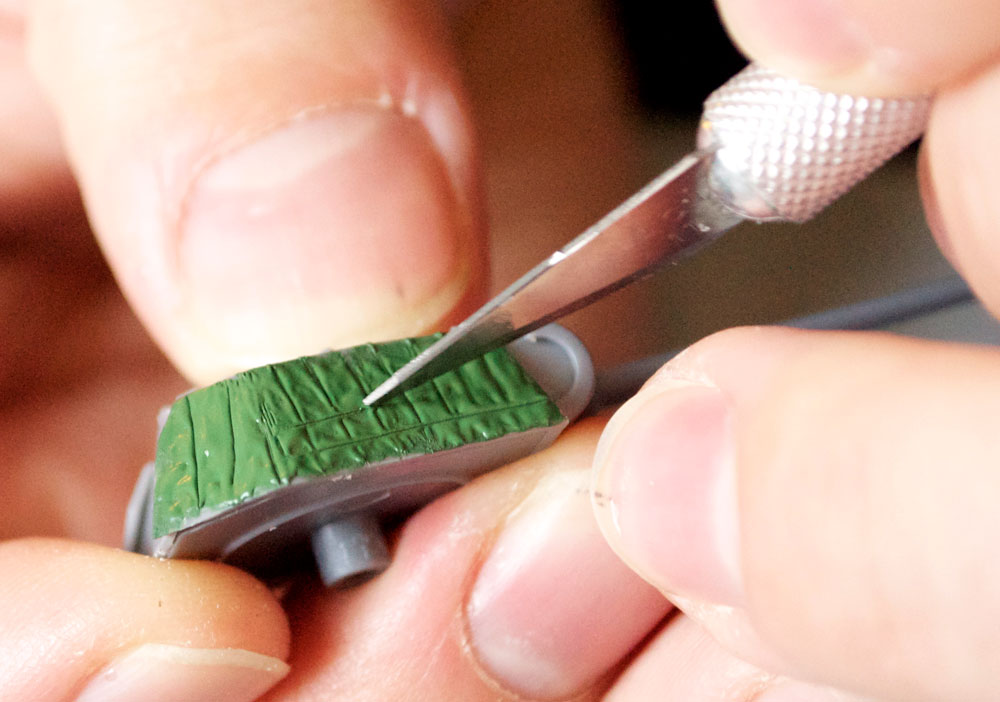
Next I take the sharp end of a hobby knife, and start 'drawing' the lines from zimmerit. For the Panther, these will most likely be lines about half a millimeter or so, and I tend to do vertical first.
Next the horizontal lines, as you can see above, give a nice effect. Sometimes you may have to draw the blade along a line two or three times, and I often wipe the blade off on my fingers, to keep it clean. (You'll see my fingers getting green spots as I go on.)
While the turret side is drying, I move to the hull. Be careful to go around the tools, though the nature of liquid greenstuff is such that it's not terrible if you do end up getting a bit on it. Like the turret side, I dab this on an entire side before moving to the next stage.
Next, the hull is lined. If the greenstuff starts to go dry (as you can see above) you can switch to the back, thicker side of the craft knife, which will make wider gaps.

Here you can see an entire side of the tank pretty much 'done'.
Another important part is the turret front. There's lots of angles and subtly different parts on this.
First, be very careful not to accidentally fill in the gunner's sight or the MG slot when applying the greenstuff.
Similarly, make certain to get the turret front behind the mantlet, as well as the side, before anything dries.
For the most part, the mantlet zimmerit is the same as the rest of the tank, except two key places: The mantlet side is lined radially, and the gun barrel's slot is also lined, along the length of the barrel. these were done very thinly, and so again I use the sharp side of the blade, even if it's dried.
The rear of the hull is the last difficult part to do. Here you have one advantage, in that the back of a Panther was almost guaranteed to be caked in mud, so you can really go to town texturing it.
once the greenstuff is applied, again I line it, with the stowage bins getting just the thin vertical lines we saw before on the gun mantlet.
And that, ladies and gentlemen, is how a PSC Panther earns its zimmerit! I will have completed pics of the zimmerit next time when I discuss specifics of modeling the early Panther G, as well as making realistic G vents, and then tackling stowage! Best of luck with your own attempts.


Great article, and an excellent end result!
ReplyDeleteCdlT
A few years ago I tried adding zimmerit to some Battlefront StuGs using regular green stuff, and it was a complete nightmare! Your article has inspired me to have another bash at it with some liquid green stuff, I'm very impressed with the result you've achieved!
ReplyDeleteBest of luck Jay! I will say that the zimmerit applied to most other vehicles was different from that to the Panther, though I think it'd be a pretty similar application process. I may try to find a cheap 'other German vehicle' to try the other zimmerit type on.
Delete