Sunday, March 24, 2013

How to Make More Accurate DAK

I finally managed to get pictures of my Schutzen, and some of them even came out! I figured rather than just showing them all, I'd talk about something that's 'missing' from the Afrika Korps. For the sake of the cold nights, every member of the DAK was issued a winter coat. Often, they would wear these even during the day. I'm not certain if this was convenience or temperature, but nevertheless, in photos of the DAK, you often see a mix of winter coats and helmets, winter coats and hats, etc.

To get my full three platoons, I purchased one of the Winter Panzergrenadiers, and two of the DAK Schutzen. Before painting any of them, I split them up so each platoon would have a roughly equivalent mix of greatcoats to tropical gear: Again, roughly 2:1, but with leftovers, it skewed more to non.

Replacing the heads was also fun, trying to clip off desert hat heads, and putting helmets on the ones I clipped. Of course, AFTER I get them all finished, I get the artillery set, and an abundance of heads without helmets. Bandanas made a great way to add some distinct colour to what would otherwise be a very sandy coloured everything else.

Pic-dump Time!
 

Friday, March 22, 2013

I Want to Ride My Bycicle

Hey folks, short post today, as I was hit hard with a 24-hr flu yesterday. Two days ago, however, I managed to get some fun work done on my Firefly conversions. I have now added pretty much all the stowage they're going to have, and have ground down the muzzles to look more realistic.
Also, I have used my method of making camo netting on one, and am trying to hide as much as possible their origin as not Fireflies...
Finally, I decided to do a fun bit of conversion on the back of one, as another 'trophy' find from a tank. Also, I imagine it's useful at the end of the day to get around when a jeep's not available:
As you can see, it was made using modelling wire bent how I needed it, and is based on a photograph of a period bike I saw. To hide the wire origins, much of it was then coated in liquid green stuff:
You can also see the addition of a plasticard set of gears, and a pedal. I will be giving it a few more coats to widen the wheels and smooth things out, and hopefully when painted it'll look right.

I have also finally taken photos of my Schutzen, and the painted part of my Tank Company, and will be uploading those over the weekend after I'm done convalescing...

Tuesday, March 19, 2013

8.8 Flak 36 Limbered

While the T16s are being painted, I figured I'd show some photos that were posted on Flames of War, but not necessarily on here yet. Here's a project I did along with a Schutzen Kompanie a while back.

In Flames of War, guns that are limbered to a truck to move are just dragged behind. In some cases it doesn't seem too odd, but I still find it a little strange to have a fully deployed gun with its crew, somehow surfing behind a truck or halftrack.

Where this is especially strange is the 8.8 Flak 36. It is a huge gun on a cruciform mount, and until it's attached to its wheel limber, wouldn't move short of a tank hitting it. I did not want to have such a look, and the Flames of War model thoughtfully comes with limber halves. I set about converting the rest to have limbered versions of my unlimbered guns, for when they're dragged behind their halftracks:
 First up was the relatively simple limber and mounting. This was done primarily by tracing the metal one provided by Battlefront, with extra pieces for the most part using leftovers. The centre of the limber has two pieces of tinfoil, as well as some extra sprue bitz and small cut triangles. The front and back are the metal provided limber halves.

Next came the gun. For this, I got various sizes of plastic rod, combined them with carefully aplied pieces of tinfoil, and modelling wire, and carefully glued each piece, again using the BF one as a guide.

Here's the breach end. Thin plasticard, as well as a thicker clump grooved out simulated the actual breach, with remaining detail being a mix of plasticard, wire, and tinfoil.


The base of the gun went next, and involved a bit of guesswork. The detail is simplified from the real gun, as I hope in most games to not ever have to use their limbered versions! Again, the BF gun shield made a great trace proxy for the custom version.

Here's the full limbered gun, pre-painting. The gun wasn't glued facing down that far, but rather straight ahead. In the background you can see the deployed 8.8, and why I didn't want to have it just 'surf' behind the halftrack.

 And here it is painted up! The 'barn doors' have been painted with a grid pattern, which simulates how the deployed one was painted. While its detail is not exactly on, it does bear enough of a resemblance that from 'table distance' they're indistinguishable.
 Here as well is the only place it's distinctly not the BF version. From the gunner's seat, a couple of the detailed control knobs are just cylinders. Otherwise I'm very pleased with how it turned out, even if they sadly (luckily?) have yet to make it on the battlefield.

Friday, March 08, 2013

T16s nearly done!

So I have finally managed to cast, and glue in, the remaining T16 crew! With them came a huge bunch of stowage, enough that I feel any more would hinder its combat role. I have (since these photos, black-sprayed them, and given the initial airbrush of green.
 
Here they are, all lined up and ready to go! The metal 'guards heads' from BF were incredibly useful for the casting, and to the right is the command UC that comes with the box set of 6pdrs. In a couple places, just to add variety, I have inserted British tank commanders from the Open Fire set. I can also say with hindsight, having basecoated them, that the rivets work! Liquid green stuff, with one or occasionally two coats to thicken it up, will indeed look like rivets if applied carefully! Much less work than trying to cut plasticard or paperclip to length and filing it back!

The other rivet counting thing I did was add the metal frame protector for the front left headlight. I had some spare PE metal sprues laying around, and carefully cut and bent them to length. Though they were easily the finickiest things I had to add to this project, the effect is, I think, quite strong!


In similar news, I have decided that rather than turning the remaining three otherwise unused Shermans from Open Fire into wrecks, I will convert them to Fireflies. Canadians in late-late war get to bump Sherman troops up to two Fireflies each, and this will give me a low-cost way of doing just that!
This project has certainly been more straightforward, but I think I'm less impressed with the outcome:
First, the tanks were assembled save the gun barrel, and the mount for the hull MG was shaved down. Next, I cut lengths of plastic rod to roughly the right length. The gun mantle was cut to accept the new barrel size, and stowage was prepped to cover the hole on the hull.
Next, copious amounts of putty were added to the ends of the barrels, so that I could shave them away for the muzzle brake. The turrets were then modified to have the second escape hatch, and since these photos, I have cut back the muzzle brakes, sloped the base of the gun barrel appropriately, and added a PE metal piece 'hatch hinge' on each. I've also added the externalized radio, and two storage bins to the backs of the turret. I'll put more photos up when they get further along, but as you can imagine, the next little while will be devoted to painting T16s!

Sunday, March 03, 2013

Evolution of a Paintscheme

I have had a Tyranid force lingering around for some time, and 'recently', got my fiancée into Warhammer as well. For the sake of not rolling over her with a force I'm a veteran with, and to motivate me finishing them, I started to research a paintscheme.

I decided rather than going especially fantasy, I would draw inspiration from real exo-skeletal creatures, and picked the Lobster. First, trying to find an image of an un-cooked lobster on Google is interesting. Second, even searching "marine lobster" engaged rule 34!

Finally I found a series of pictures I liked, and painted up a series of test models:
Primer coat black, base-coat light leather brown, highlighted to yellow, then over-washed with dark red and black, done in a splotchy pattern. While this looked fine for the Lictor (a lurking, camouflaging creature) on the rest it just served to limit the amount of detail that was visible, and lacked the contrast I felt it needed. I next painted a Ravenor, and decided to refine the scheme a bit more, making the hard shells still the same method, but stopping at the yellow, for the most part, highlighting the body:
On this one, to enhance the contrast, I also made the rib-seeming sections even brighter yellow, by highlighting with a bone colour, and extended the mottled pattern to the softer, snake like tail. I liked this style enough to then try it on the mother of all monsters in the Tyranid force (at the time), the Carnifex:

On this one I further enhanced the effect by painting gloss black for the plates, doing a pseudo-pointillist technique for the red and black, and trying to further brighten the yellows on the skin. I also dropped the black glazing for this, instead just painting on for the armour plates. The problem was, even here, the base colour was black, meaning it took many layers just to get it up to yellow, and didn't look as good as I figured it could be. I know we're straying from lobster, but then, so are the Tyranids!

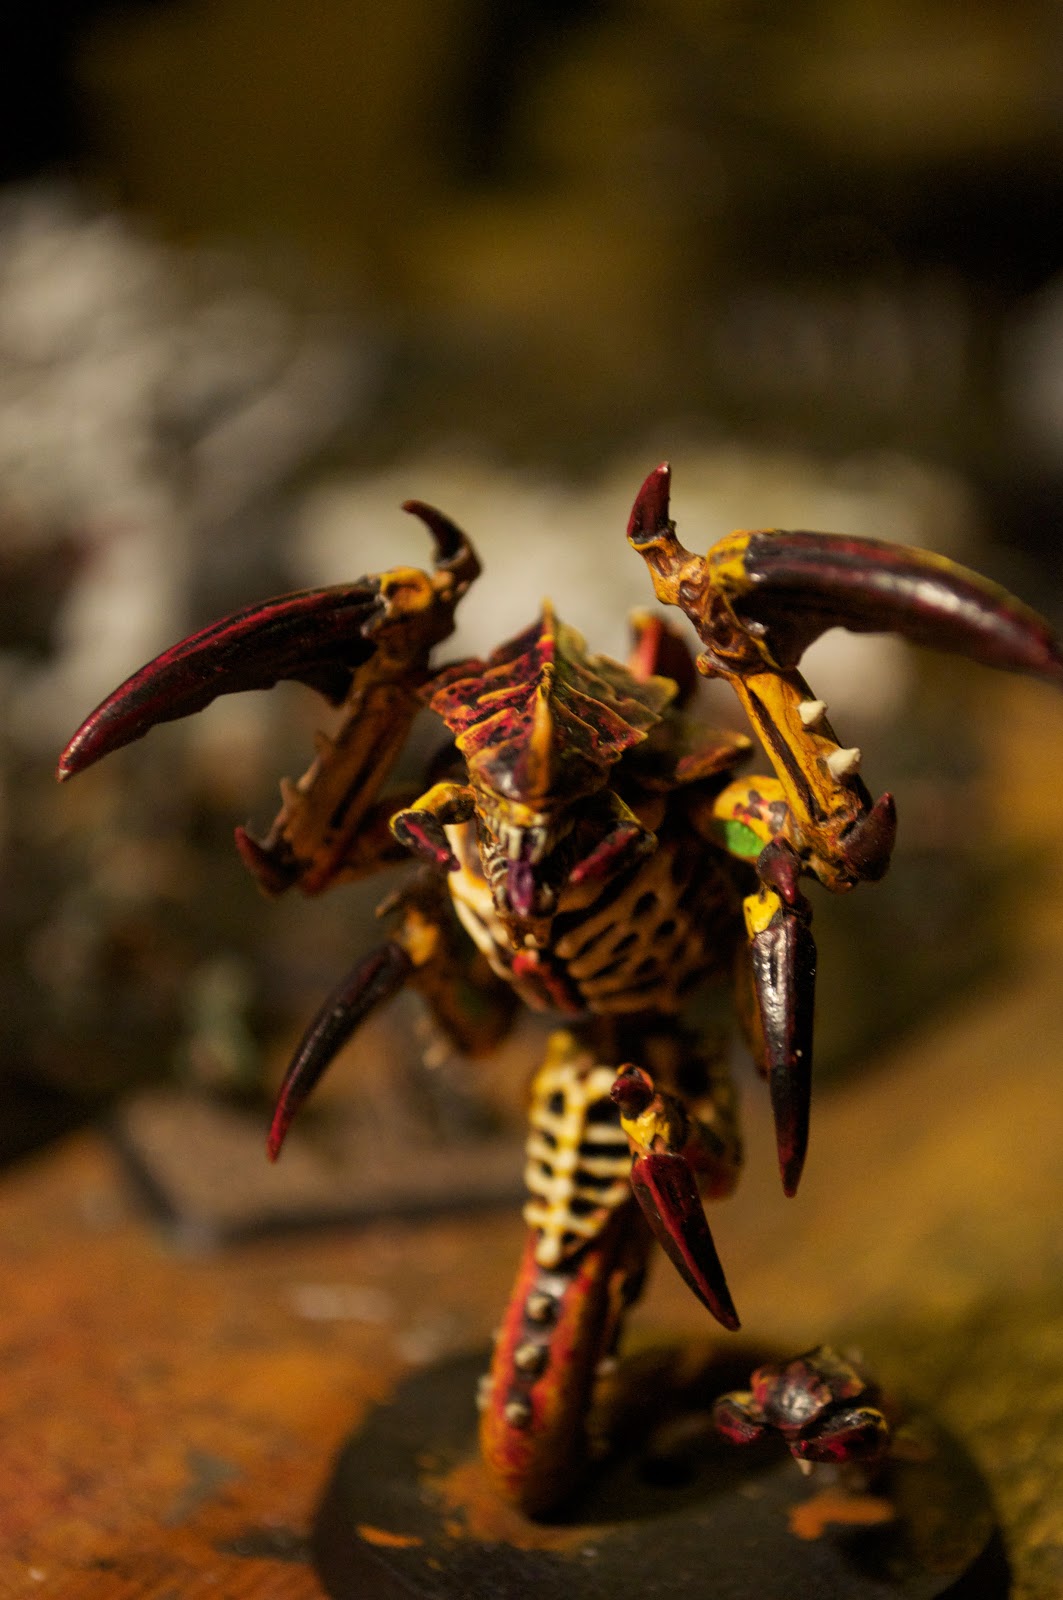
Finally, I have refined the scheme with my Hive Tyrant, now about half finished:
The photograph does not quite do justice to the colours on this guy. Primered in white, and using an airbrush to over-layer both the bright yellow, and yellow-mixed-with-brown for shading, as well as for most of the red sections, this beast is bright enough to look like a poison dart frog. The black is entirely gloss black paint, and since it's painted over thin airbrush-based undercoats, it really makes the carapace glisten. To me, the best part of this final solution is it saves enough inspiration from the lobster to seem natural, but has a very heavy "how Nature says do not touch" aspect with the bright yellows and reds. I'll post how it looks on the baby bugs when I get them painted as well!